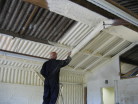
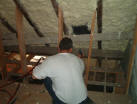
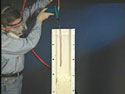
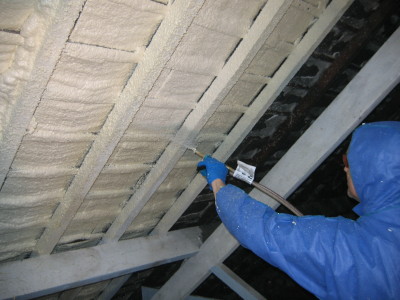
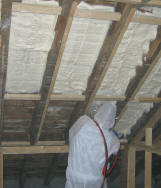
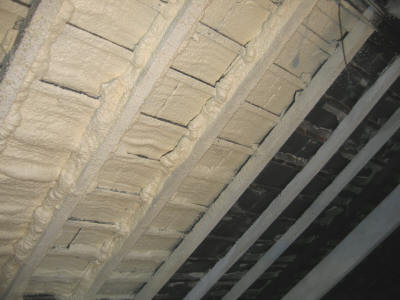
Cavity Wall InsulationMany houses built in the UK were built using cavity wall construction. The air gap in the cavity provided insulation. With rising energy costs it has become necessary to improve the insulating ability of the cavity. Approximately 25% of heat loss from a house occurs through the walls. These days, the only way to improve the insulating properties of the cavity is to use a suitable insulating material like polyurethane or rockwool in the cavity. This is easily done when the house is being built, but what about an existing house? The solution is to inject the insulation through specially drilled holes and then cover the holes afterwards with a suitable filler. Despite the fact that current building regulations require the use of insulation in cavity walls, we recently came across a new-build where the cavity insulation was less than adequate because it did not cover the top 10 inches of the inner wall! Follow this link to read more about this case. Guide to Cavity Wall Insulation - A Step by Step DIY GuideIn order to fill a cavity wall, you will need to do a little more investigating as to the size of the cavity you are planning to fill, and make certain that there are enough spots for you to drill holes in order that you can ensure the even distribution of the foam. You can measure the depth of the cavity by drilling a hole in the wall and using a stick or rod to measure the depth. Case scenario: Assuming you had a wall that, has a height of: 2.5m and a width of 5.5m, and the cavity gap is 100mm, you need to multiply the height of the wall by the width of the wall by the cavity gap: 2.5m x 5.5m x 0.100 = 1.375 cubic metres. 1 large kit would be sufficient to fill the cavity gap, as the large kit has a cubic metre capacity of 1.42.  The procedure is relatively simple, in that you drill 10mm wide holes into the wall to inject the foam through. These holes can be sanded down and covered with Poly-filler or similar after the foaming is complete. Each hole should be approximately 50cm apart and 50 cm from the bottom of the wall. Below is a simplified diagram of you would do. The rectangle represents the wall and the black dots represent the holes you would drill. You would start with hole 1 and inject foam for 15 seconds and let the foam rise - if the foam starts coming out the hole plug it with a rag (it will continue to rise up the cavity). The foam will have fully expanded after 90 seconds. You would then move onto hole 2 and repeat. You should proceed along the numbered holes following the same process. If after plugging hole 1, you find that foam starts to come out of hole 6 or 2, plug hole 2 or 6 and skip those holes out as you proceed along the numbered holes. This applies to the entire wall. If foam comes out of other holes, it means that the foam has spread to this area.  We also supply vinyl tubing, which fits on the end of the spray nozzle. This is essential for injecting through the holes in the wall. These are available in 30m rolls at a cost of £12 per roll. |
|