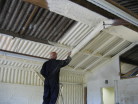
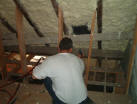
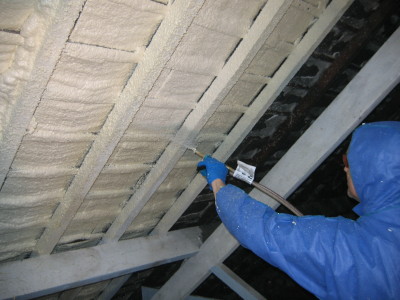
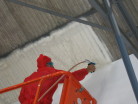
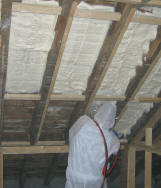
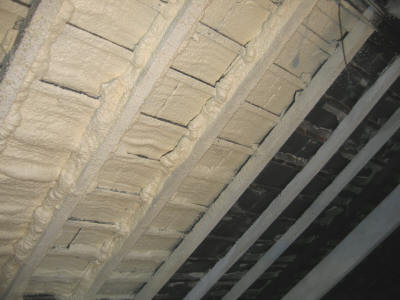
New Build Insulation ProblemI live in a house built 3 years ago, as such it had cavity insulation installed on construction. But there is a problem; living in the house, I have found the insulation is pretty ineffective because of the way it was installed. I have been back to the builders and they in fact investigated the problem along with the local authority buildings inspector. The problem is that, as this is a chalet bungalow, the overlap from the roof drops below the height of the inside walls. At the point that it does this, the interior walls have no insulation on them where they extend above the top of the cavity. They also connect with the roof overlap, which has to be vented according to the buildings inspector to stop damp. It has both under tile vents and a soffit vent grill. 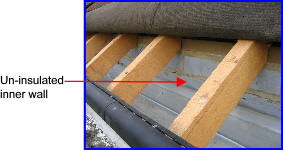 So in effect the top 10 inches of rooms at the front and the back of the house has no cavity wall insulation and so this makes the insulation ineffective. Heat rises and goes out this gap. In effect the top blocks of the inner walls are exposed to outside air. The wind blows in and cold penetrates. They even stuck down the gap between the internal plasterboard ceiling and the wall in this gap to stop the wind blowing behind the internal plasterboard ceiling. In fact the void is so well vented that the wind blows into it, especially as I live on a hill exposed to the winds that blow off the sea. 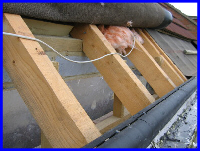 I have built a conservatory onto the kitchen at the back and this has improved the temperature of this room. It has stopped the wind blowing in here. It is now the only warm room in the house apart from the downstairs loo which is at the side of the house so does not have a wall adjoining the front or back of the house where the problem occurs. I have got to do something. I've just got a bill for heating and lighting that's huge -£600! Excerpt of an email from Andie Camper in West Sussex. Unfortunately the builder and the building inspector could not agree on a solution, leaving Andie with a cold house! The SolutionWe removed the first two rows of roof tiles and the wooden batten holding down the roof felt. This allowed us to gain good access to the non-insulated part of the inner wall. 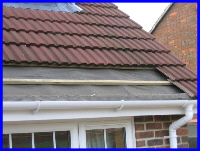 The expanding foam was then sprayed onto the non-insulated part of the wall and over the top of the cavity using a DIY spray foam kit. The sprayed insulation sealed the cavity and prevents drafts from cooling down the internal wall. 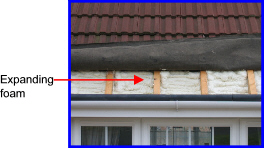 We then sprayed the insulating foam up and onto the edge of the rockwool (which insulates the ceiling of the lower room). Handi-Foam stuck extremely well to the rockwool and ensured a continuous insulation envelope. It will also prevent the rockwool from moving. We sprayed to a depth of 4 inches, as this will provide excellent insulation. Spraying the foam into place is simpler and less time consuming than cutting, fitting and vapour sealing insulation boards. 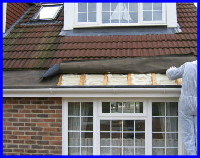 We were able to maintain a 50mm gap between the edge of the insulation and the tiles, thereby complying with building regulations. Feedback"Well its just about been a week now. The house has been less chilly. The dining room has been much warmer than it was. The hall way is still a little cool, but possibly thats more to do with heat rising up the stairs to the un-insulated areas around the dormers. We have both noticed an improvement." |
|