General Spraying Guidance - All Foam KitsUsing Handi-Foam spray insulation kits is simple provided you follow some basic guidelines:
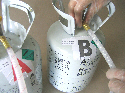
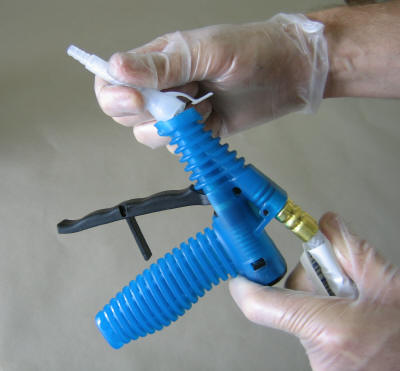
Simple enough isn't it? Below, we have provided some practical tips to help: Heating the tanksUse a domestic heater to warm the cylinders in a small room overnight, or place them in a warm airing cupboard overnight to warm up. Remember that the room needs to be at least 30 degrees centigrade in order to get the foam tanks up to this temperature. Alternatively, the tanks can be warmed up in a tub of warm water. The water should be at body temperature. Do not be tempted to use hot water. Remember, both tanks must be at the same temperature, as this ensures the viscosity of the 2 components are at a 1:1 ratio. Why is the temperature crucial? The foam chemistry works best if the tank temperature is between 24 and 30 degrees C (75-86 Farenheit). Below this temperature range, or if both tanks are at not at the same temperature, one of the tanks will empty faster than the other and you will not get the maximum amount of foam out of the kit. Foam quality will also deteriorate. If the temperature of the tanks drops below 24 degrees celcius whilst spraying - immediately stop and re-heat the tanks. Shaking the tanksThe tanks contain a mixture of chemicals, therefore it is important to shake the tanks before use (or rock the larger tanks back and forth for a minute). This ensures good mixing and is important for getting the maximum amount of foam out of the kit. If the tanks are not shaken, a lower foam yield will result i.e. less foam for your money, and one tank will empty before the other Changing/Cleaning the nozzlesThis is crucial to ensure trouble free operation of the spray gun. The foam begins to cure or harden the moment the 2 components are mixed (this happens in the nozzle). Change the nozzle at least every 5 minutes (if spraying continuously), or if you stop spraying for more than 30 seconds. You have 2 options regarding nozzles:
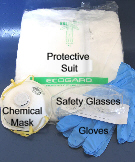
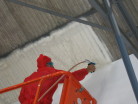
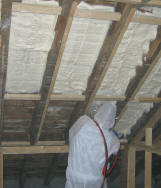
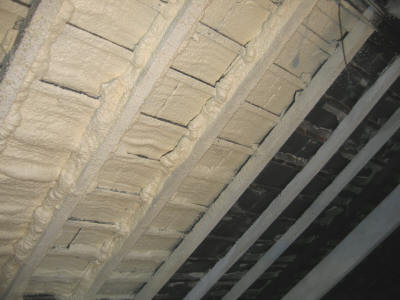
When you stop spraying (even if it is only to move a ladder) the foam continues to set in the nozzle. If you attempt to continue spraying after stopping, you risk causing an irreversible gun or hose blockage. As the guns and hoses are not serviceable, a blocked one means the gun goes in the nearest skip. If you choose to clean the nozzles with acetone, they must be submerged in a tub/container of acetone immediately, as this will clean it. Acetone is available from our product page. Obviously cleaning the nozzles is the most economical method, but it must be done immediately, before the foam sets. The nozzles are made from a semi-translucent plastic, so you can see how effective your cleaning is. Protective Clothing & VentilationAs you would do with painting, wear protective clothing (overalls & gloves), eye protection and a dust mask (these are available on our product page). Cover floors, carpets, furniture etc to protect them from over-spray. Ventilation is important. Open windows and if necessary use a fan to push air into the room. Spraying TipsSpraying Foam is similar to spray paint. Start off with a thin layer and build up as needed. Remember that the foam expands before hardening. A layer of approximately 1/8" will expand to around 1 inch. The foam flow is controlled by how much you depress the trigger. For good even results, don't pull the trigger more than 1/4 - 1/2 way and hold the gun approximately 30cm (12") away from the surface being sprayed. After use or between jobs:
How do I check that the gun is OK?There is a very simple check for this, and this should be used every time you change to a new set of tanks, or if you think you may have a problem with the foam:
All kits come with a comprehensive set of instructions and safety information, which you must read and follow. If you are unsure of anything, please feel free to contact us for advice on +44 (0) 1275 778 195 |
|